
My "string" quilt.
I have been interested to look at all the string quilts happening on the blogs. I went to the new Heartstrings site and found all the detailed instructions which were great. I've always done mine a little differently and as I like this look as well I thought I would share.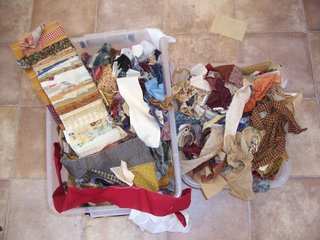
1st step: Find those containers, like the above, that are full of your strips and scraps. You can probably see here that there have been times when I have been all enthusiastic and cut and rolled my scrap strips, but from the rest of the containers you can see it doesn't happen often!
2nd step: Pull out a range. I just grabbed anything and gave them a quick iron, I didn't worry about tiding the strips, they were sewn 'as ironed'. If you want red centres to your block you should probably have a fairly wide red middle strip but I wasn't worried about that. they are best if they are at least some varying widths as you don't want it to look like it's meant to match but is a little out-make sure it looks a lot "out". Or you can go the completely different way of having all your strips the exact same widths and getting an equally good end result, just with actual precision required! Sew these together and press, all one way is the easiest when later joining them together.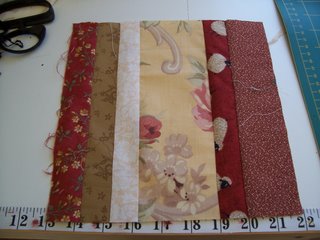
3rd step: Neaten it up. My strips seem to wanted to come out at around the 9 inches long so I trimmed them to be exactly 9 long and 9 wide. You can make this part as big or small as you like depending on how many strips you want to use and how wide they are.
4th step: Cross cut as shown. I've separated them to show you but don't separate them between cuts.
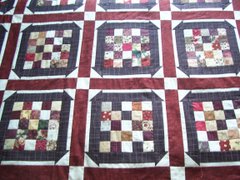
5th step: Start playing!! This is what 4 of those blocks has produced in around 10 minutes. As you make more you can play around further with how you want it to look and get some quite interesting patterns happening. I quite like how this is looking and had forgotten what fun it was so I will probably shelve a few things and finish it off! (This is why I have to make aims on not starting 2 quilts in one day, I am easily sidetracked!)
Have to run, DH calls, I may try to answer a few questions and post tonight, Cheers, Tracey
Add-on: Nov. 20th (i think) has a photo of a quilt done in brights and made using this technique. Sorry, it wouldn't re-upload and I don't know how to link so you will have to search if interested.


4 comments:
Tracey~ this is a GREAT idea! I have a strip set I had INTENDED to use for a bargello jacket. AHEM! well..>THAT is not happening! I think I will try your method and see what happens. I'll let you know how they turn out. (I'm in the middle of a challenge..so this could take awhile!) Beth
The is a great idea. When I cleaned my room recently, the number of strips I found was a little overwhelming. Your method just add a little 'pizazz' over the traditional string method
Love your string quilt! That looks so possible to do!
Hello there. Its my first time on your blog. I LOVE it. Your quilts are great and this post of your string quilt directions is excellent. I think I now have a new mission for all those left over binding pieces/strings. Thanks.
~jen~
Post a Comment