
Basic 15 minute quilted bag tutorial
I have finally had a few minutes to put this together for you.
It is my basic design that combines a lot of ideas. This is very much the basic bag, the one I would use as a gift bag or for little girls. There are a number of ways to enhance it, and all of you would be able to do that fairly easily....sew a fabric loop into the lining at the top stitching part if you want to add a toggle/button to close; rick rac in the top stitching, add more quilting by stitching in the ditch along some of the patchwork seams, do proper fabric handles, these are cotton rope.
I haven't put measurements in as it is a bag made by personal taste and what you want to use it for.

To start: I usually grab a handfull of coordinating scraps, iron them, cut them to even sizes (not necessarily all the same) and start. Today I grabbed out a sanctuary jelly roll for a play, so all are 2 1/2 inches wide.

I sewed through the full width of the jelly roll, like you are quick piecing, I will make up a number of these bags at once so I have some in the present stash.
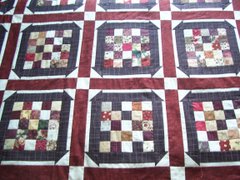
Here is the strips sewn and pressed. The quilted fabric is an op shop quilt, if you don't have any prequilted stuff, then just pin wadding to an 'inside bag' corodinating fabric and continue on with the instructions.

I cut the quilted inside of the bag and the patchwork fron all at the same time so everything matches. Here I have the parts for 2 bags. I haven't taken a picture of the next step as it is quite simple-place the two patchwork pieces of the bag right side together, seams should match-pin them to ensure, then sew the two sides and the bottom with your usual size seam. (1/4 inch.)
Repeat for the lining.

You now should have a separately sewn lining and front (patchwork) section for your bag. You need to do the paper bag corners-the bag looks more professional this way and sits better.
This seems to confuse people but you are basically just sewing across your corner seam. You can press it flat like this, then mark your sewing line on both corners and hey presto, paper bag corners. I sewed mine an inch in because that suited the size and height of the bag, you can vary accordingly. Remeber to do this to the quilted lining as well!!! 

See, this is what it looks like inside out when sewn.

Now place the patchwork bag inside the quilted lining bag-right sides together. This is when I decide how long I want my handles and how wide apart. I measure, mark and pin accordingly. make sure your handles are exactly the same lenghth and that you sew them with the same amount of tail poking out. They are such a pain to fix when you finish!

Here the handles are pinned in-you can't see the handles because they have to be pinned using the same premise as right sides together-you want them on the good side at the end. So they are pinned between the good sides of the patchwork front and the quilted lining. You can only see their little tails.

Important part! For the rest to be oh so easy, you now must do at least a half inch seam!!! You also must start it just before a handle, remember to backstitch really well at the start and once over the handles.

You then end up with a bag lookinglike this, the big gap is between the handles, this gap will be as big as the gap you chose for the handles. That is where you turn the bag through to get everything on the right side, so don't leave it too small or you stretch your seams.

I did take a picture of how you then pin the gap before lengthening your stitch to at least 3 and topstitching (using quarter inch seam) but it doesn't want to upload. I think you would all get that idea, gives a nice neat finish. Of course you could handstitch the gap closed and not topstitch but it's quick and reinforces the handles as well.
This is my finished result and here is the one i just did with the chenille and scraps, also a few I have done for the kids with the patchwork/handles different.

 If I have missed anything, could the first few commenters yell out and I will fix it up or reclarify. Feel free to ask for more information.


 If I have missed anything, could the first few commenters yell out and I will fix it up or reclarify. Feel free to ask for more information.
 Happy bag making....oh and the winners for the cards are quilting bebbs and Kim at Stillmeadow, my birthday girl picked you out!Email me your preferences, Tracey


11 comments:
Great tutorial, thanks. ;-)
Great tutorial, Tracey! Thank you so much!
These look very fun! I may make up a couple for my "present stash" too!
Thanks for the bag tut! You are very good and explaining the process of doing quilty things.
Will choose cards. Thank you to "birthday girl" for picking my name out of the hat!!
You make it all look so easy. Perfect for a present stash.
Thank you so much, great tutorial. I picked up some pre-quilted fabric for linings, and can't wait to get my "present stash" started.
Very cute totes and one can never have enough of them. My grandson would love the John Deer*e one to keep all his toy tractors in. I may have to do one for him.
Easy to understand tutorial too.
g'day
Thanks for the tutorial Tracey, I have a few angel/mortal gifties to make real soon and these are perfectomondo!
Lissa
Love your quilted bag:).
I am having a bag give-a-way to celebrate my 200th post! Come here to check it out:
http://scrappynhappy.blogspot.com/2008/03/200th-post-woot-woot.html
Thanks for the tutorial. Would like to try this soon.
Hello, very nice blog. I love the handbags, I've made some bags in my blog. I invite you to visit it.
Sandra
Un abrazo
Post a Comment